重新编译Nginx启用HTTP/3协议
前言
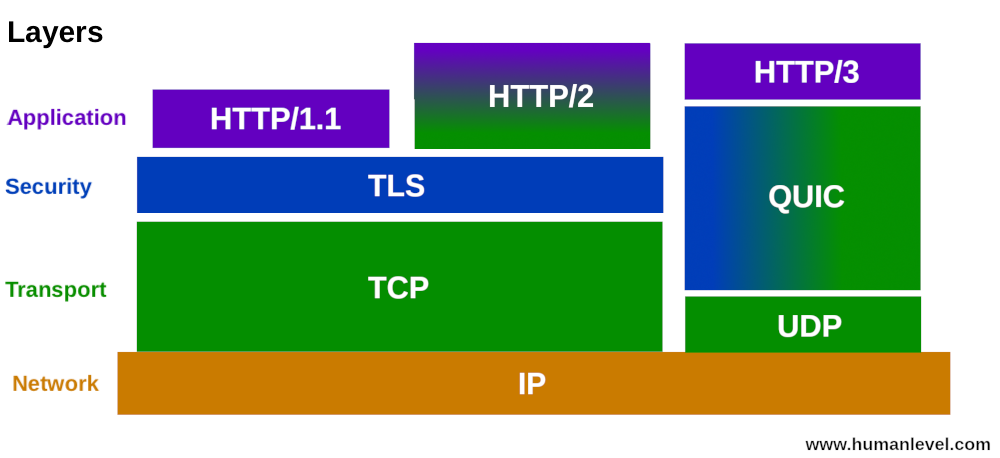
Nginx1.25.0后,正式并入了nginx_quic的模块,所以现在编译不需要拉去nginx_quic版本即可编译。HTTP/3 基于QUIC/UDP网络协议栈,相比HTTP/2来说是一次大换血。虽然UDP是不可靠传输协议,但是QUIC在UDP上实现了可靠传输,在我的理解中,QUIC=UDP+TLS+HTTP,这样的轻量级跨传输层应用层的协议可以带来更小的服务开销和更高的并发。
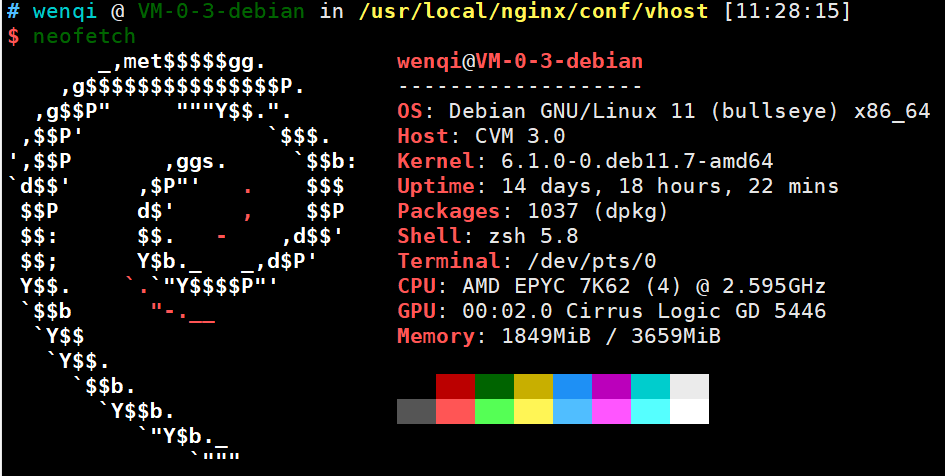
这次就重新编译LNMP的nginx来支持本网站的全HTTP/3改造升级,系统版本
如下所示
编译BoringSSL
- 安装Golang,首先去官网下载Go的二进制包,并打开包目录,执行以下命令
$ rm -rf /usr/local/go && tar -C /usr/local -xzf go1.21.0.linux-amd64.tar.gz
- 添加Go到PATH中去
谷歌推荐修改全局path,打开/etc/profile添加如下命令:
export PATH=$PATH:/usr/local/go/bin
保存后输入 source /etc/profile 让命令生效。
- 下载并编译BoringSSL
$ git clone https://github.com/google/boringssl.git
$ cd boringssl && mkdir build && cd build
$ cmake -GNinja ..
$ ninja
重新编译Nginx
本服务器使用LNMP作为Web管理后端,所以这里介绍如何修改LNMP的脚本达到一键升级的方法。
首先打开lnmp的主目录,修改如下脚本/path/to/lnmp1.x/include/upgrade_nginx.sh
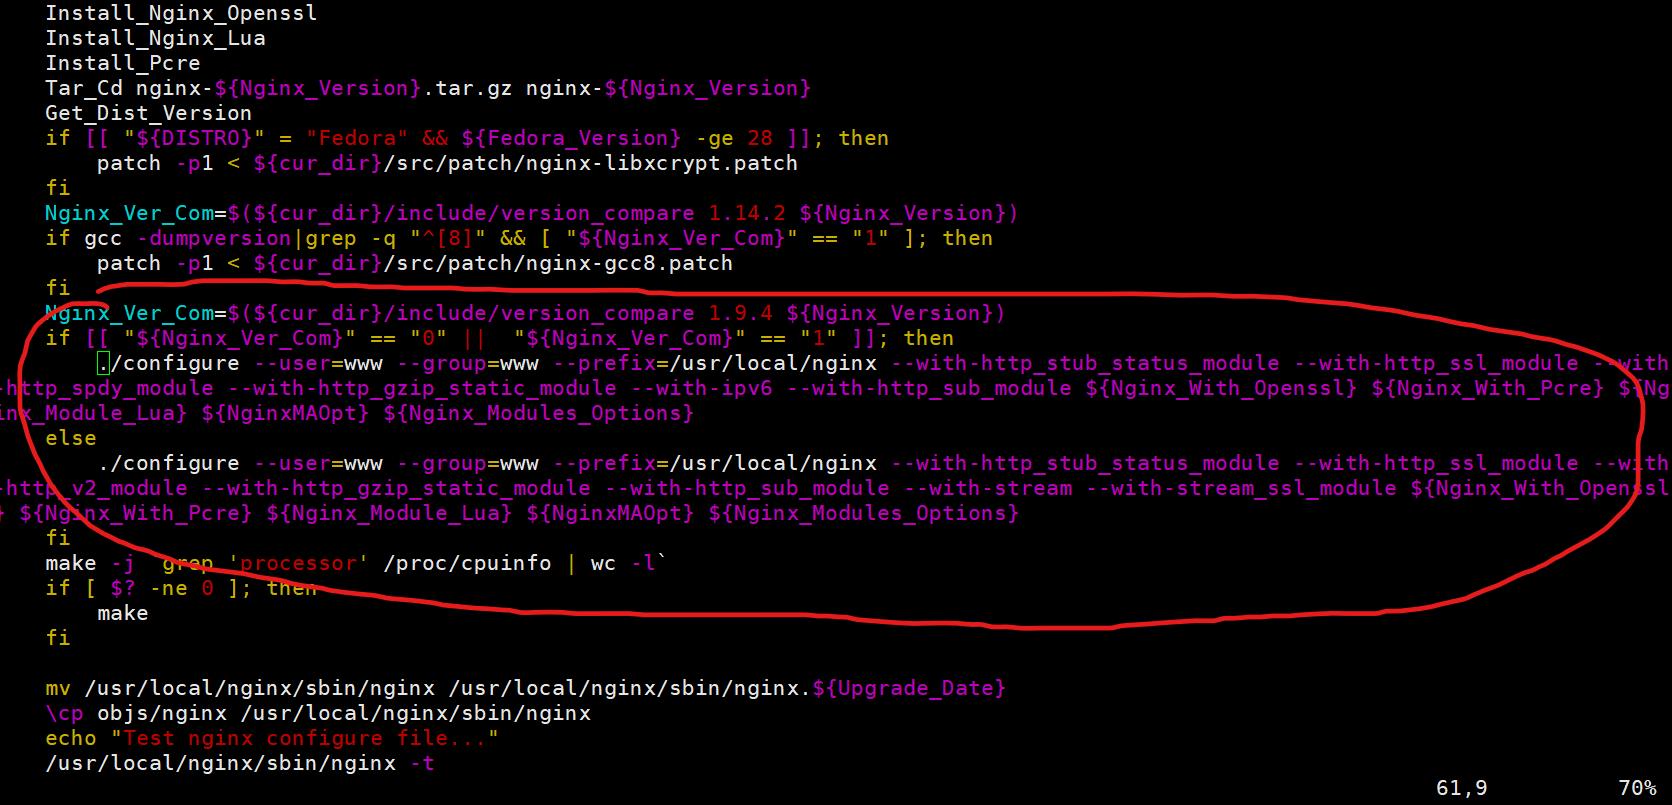
把第一段./configure开始的命令修改为我们自己的命令:
$ ./configure --user=www --group=www --prefix=/your/prefix/to/nginx --with-pcre --with-http_v2_module --with-stream --with-stream_ssl_module --with-http_ssl_module --with-http_gzip_static_module --with-http_gunzip_module --with-http_sub_module --with-http_flv_module --with-http_addition_module --with-http_realip_module --with-http_mp4_module --with-ld-opt=-Wl,-E --with-cc-opt=-Wno-error --with-ld-opt=-ljemalloc --with-http_dav_module --with-http_v3_module --with-cc-opt=-I../boringssl/include --with-ld-opt='-L../boringssl/build/ssl -L../boringssl/build/crypto'
这里的BORINGSSL相关的目录修改为自己的目录,prefix修改为编译后nginx二进制链接到的位置,然后保存退出;
使用lnmp脚本运行./upgrade.sh nginx,选择nginx版本时填写1.25.1,等待编译完成。
配置HTTP3
Nginx官方推荐配置如下:
http {
    log_format quic '$remote_addr - $remote_user [$time_local] '
                    '"$request" $status $body_bytes_sent '
                    '"$http_referer" "$http_user_agent" "$http3"';

    access_log logs/access.log quic;

    server {
        # for better compatibility it's recommended
        # to use the same port for http/3 and https
        listen 443 quic reuseport;
        listen 443 ssl;

        ssl_certificate     certs/example.com.crt;
        ssl_certificate_key certs/example.com.key;

        location / {
            # used to advertise the availability of HTTP/3
            add_header Alt-Svc 'h3=":443"; ma=86400';
        }
    }
}
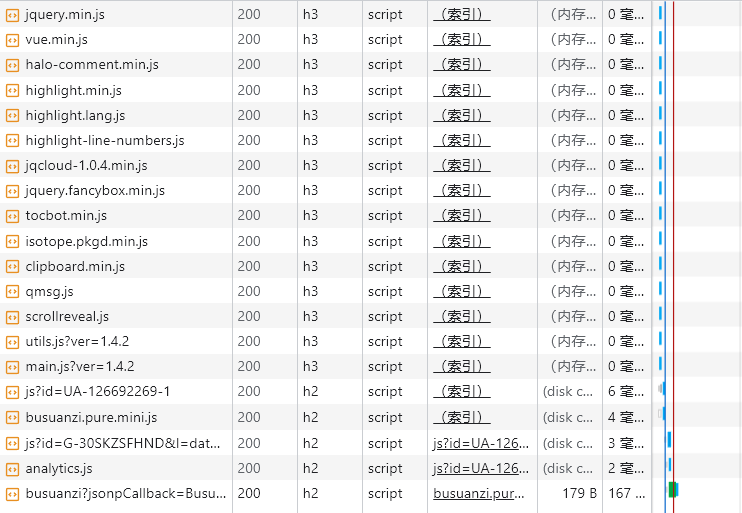
按照官方的配置修改QUIC,重启LNMP,使用chrome刷新缓存并访问,如下图所示,可以看到已经启用了HTTP3协议。